Laybys can be recalled and edited as required. For example, you can change or remove layby line items. If this results in an amount paid which is greater than the layby total, a credit rebate can be given and the layby finalised.
Micronet displays the Enter Transaction screen.
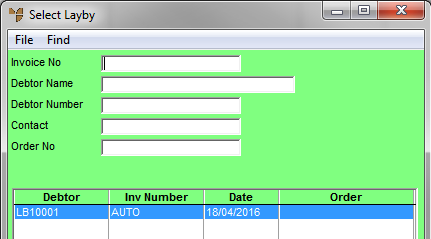
Micronet displays the Select Layby screen with a list of active laybys.

|
|
Field |
Value |
| Invoice No | If you know the invoice number for the layby, enter it. | |
|
|
Debtor Name |
To find a layby for a particular debtor, enter the debtor name. |
|
|
Debtor Number |
To find a layby for a particular debtor, enter the debtor ID. |
|
|
Contact |
To find a layby for a particular contact, enter the contact name. |
|
|
Order No |
If you know the order number for the layby, enter it. |
Micronet displays the laybys matching your criteria at the bottom of the screen.
Micronet displays the Enter Transaction screen with the layby details.
Refer to "Entering the Item Details".
Refer to "Enter Transaction - Edit Menu Options".
Refer to "Enter Transaction - File - Print Layby".